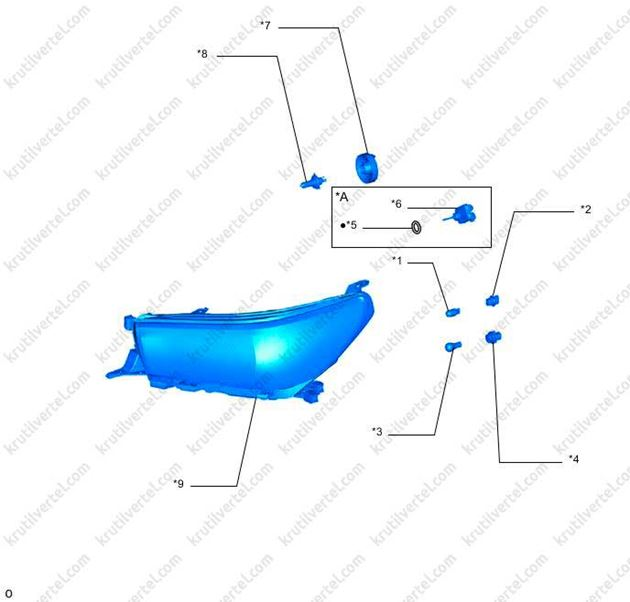
- Parking light bulb
- Side light bulb socket
- Front turn signal lamp
- Front turn signal lamp socket
- Headlight aiming motor seal
- Electric motor for adjusting the direction of headlight beam
- Headlight lamp cover
- Headlight lamp
- Headlamp module assembly
Headlamp assembly (with halogen bulbs)
Removal and installation, disassembly and assembly
Removal
1. Remove the radiator grille retainer assembly.
2. Remove the front bumper panel assembly (for models with a steel bumper) (for more details, see the corresponding section in the Body chapter).
3. Remove the front bumper panel assembly (for models with a rubber bumper) (for more details, see the corresponding section in the Body chapter).
4. Remove the headlight assembly.
- Apply protective tape to the body fender to prevent damage to the paintwork, as shown in the figure below.
- Remove the bolt and three mounting screws shown in the figure below.
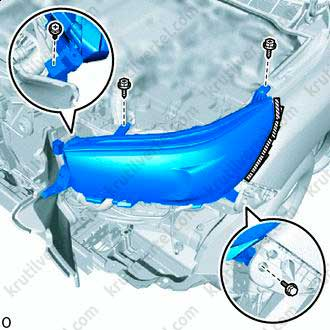
- Place your hands in the positions shown in the figure below, then detach the mounting bracket from the mounting screw support as shown in the figure below.
Note
Be extremely careful not to damage the mounting bracket.
- Pull the headlight assembly forward as shown in the figure below.
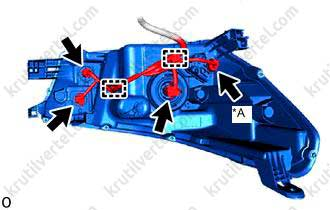
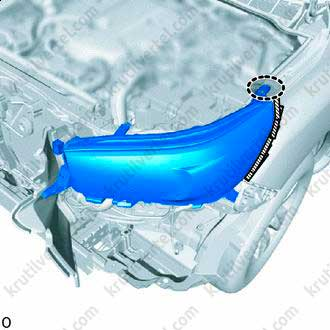
Disconnect all wiring harness connectors shown in the illustration below.
Disassembly
1. Remove the headlight bulb cover as shown in the figure below.
2. Remove headlight bulb No. 1.
- Press and remove the installation spring as shown in the figure below.
- Remove the bulb from the headlamp module as shown in the figure below.
Note:
Do not touch the lamp under any circumstances, and also avoid getting moisture on its surface. Otherwise, when turned on, the lamp will burst and fail. If the lamp was touched or moisture got on its surface, it is necessary to wipe it with an alcohol solution and dry it.
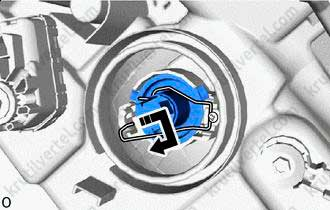
3. Remove the parking light bulb.
- Turn the side light bulb holder counterclockwise until the mark on the cover aligns with the mark indicating opening, then remove the holder together with the bulb, as shown in the figure below.

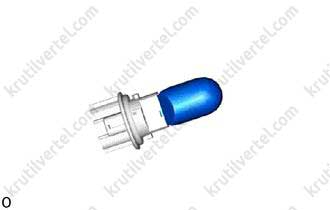
4. Remove the parking light bulb from the socket as shown in the figure below.
5. Remove the socket together with the turn signal bulb.
- Turn the side light bulb holder counterclockwise until the mark on the cover aligns with the mark indicating opening, then remove the holder together with the bulb, as shown in the figure below.
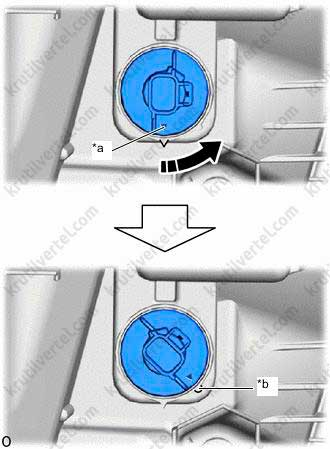
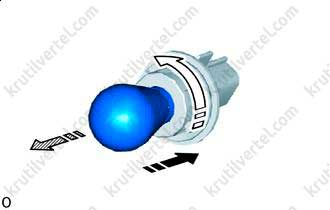
6. Disconnect the turn signal bulb from the socket.
- Press the bulb in the direction of the arrow and turn it in the direction of the arrow, then remove it from the socket as shown in the figure below.
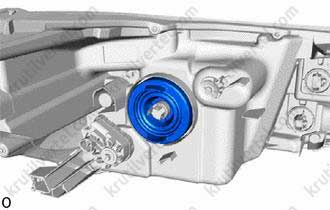
7. Remove the electric motor for adjusting the direction of the headlights (if the vehicle is equipped with this).
- Loosen the adjusting screw 20 turns.
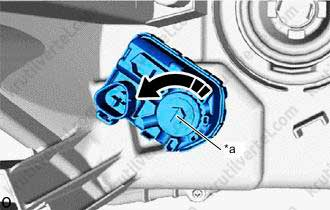
- Turn the headlight beam adjustment motor counterclockwise and remove it from the headlight housing.
Note
– Do not apply excessive force to the headlamp housing when removing, as the headlamp corrector motor module is connected.
– Hold the headlamp corrector motor with your hand to prevent the motor from falling out.
– After removing the corrector motor, it is imperative to replace the seal.
- Loosen the adjusting screw until the electric motor is completely disconnected from the headlamp module.
Note:
Note the number of turns when unscrewing the adjusting screw.
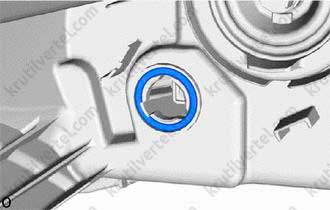
8. Remove the headlight corrector motor sealing ring from the headlight housing, as shown in the figure below.
1. Install a new headlight corrector motor seal.
2. Install the headlight beam adjustment electric motor assembly.
- Install the electric motor adjusting screw into the headlight housing.
- Screw the adjusting screw in the same number of turns that were required to unscrew it.
- Insert the headlight range control motor assembly.
- Turn the electric motor assembly clockwise.
- Tighten the adjusting screw (a) 20 turns.